Size chart tabs
Display multiple size charts for any product
Palo Alto provides the flexibility to use multiple size charts for different products. Display more than one size chart to improve your customer experience and reduce returns significantly:
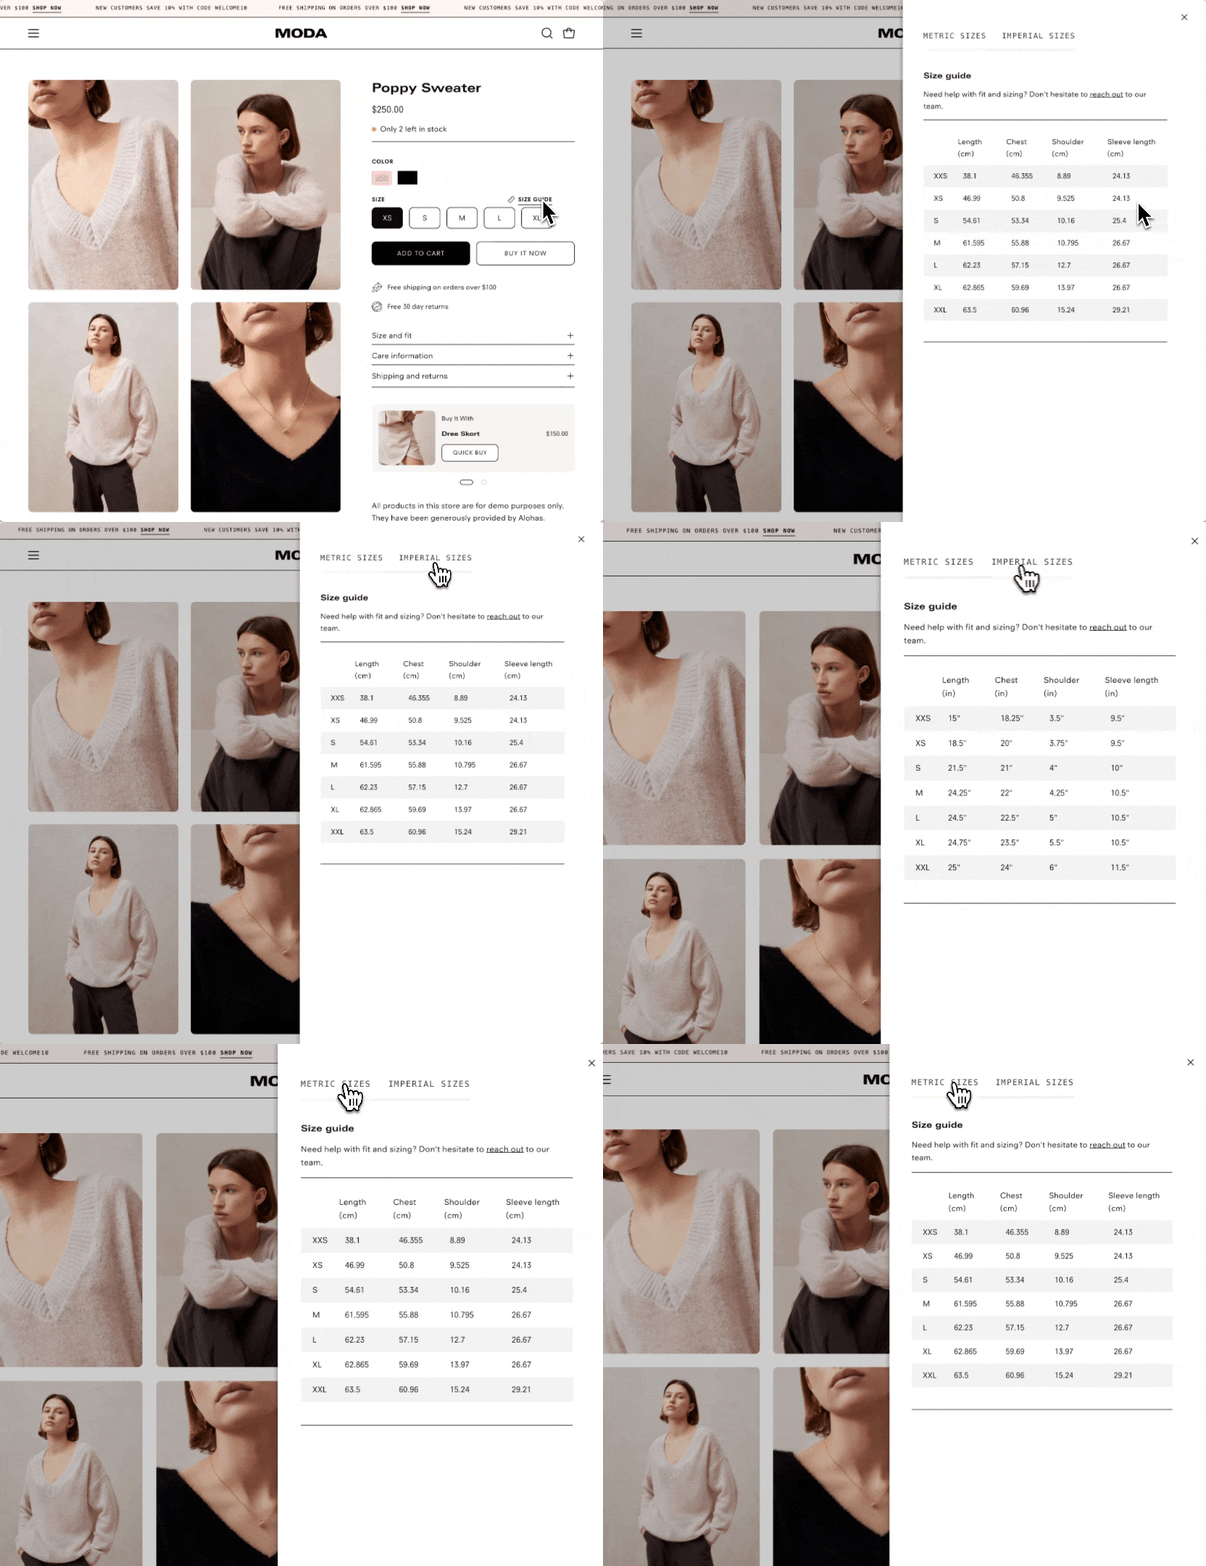
Enjoy flexible sizing: Palo Alto enables you to associate different size charts with individual products.
How to
Palo Alto uses the pages you create in your Shopify Admin and renders them in a size chart drawer for your customers. The steps are simple:
Create size chart pages using the Pages editor in your Shopify Admin.
Add custom tags to any of your products.
Fine-tune the tab options in the Theme settings.
Step 1 - Pages
The first step is to build your size chart pages in the main Shopify Admin -> Online Store -> Pages
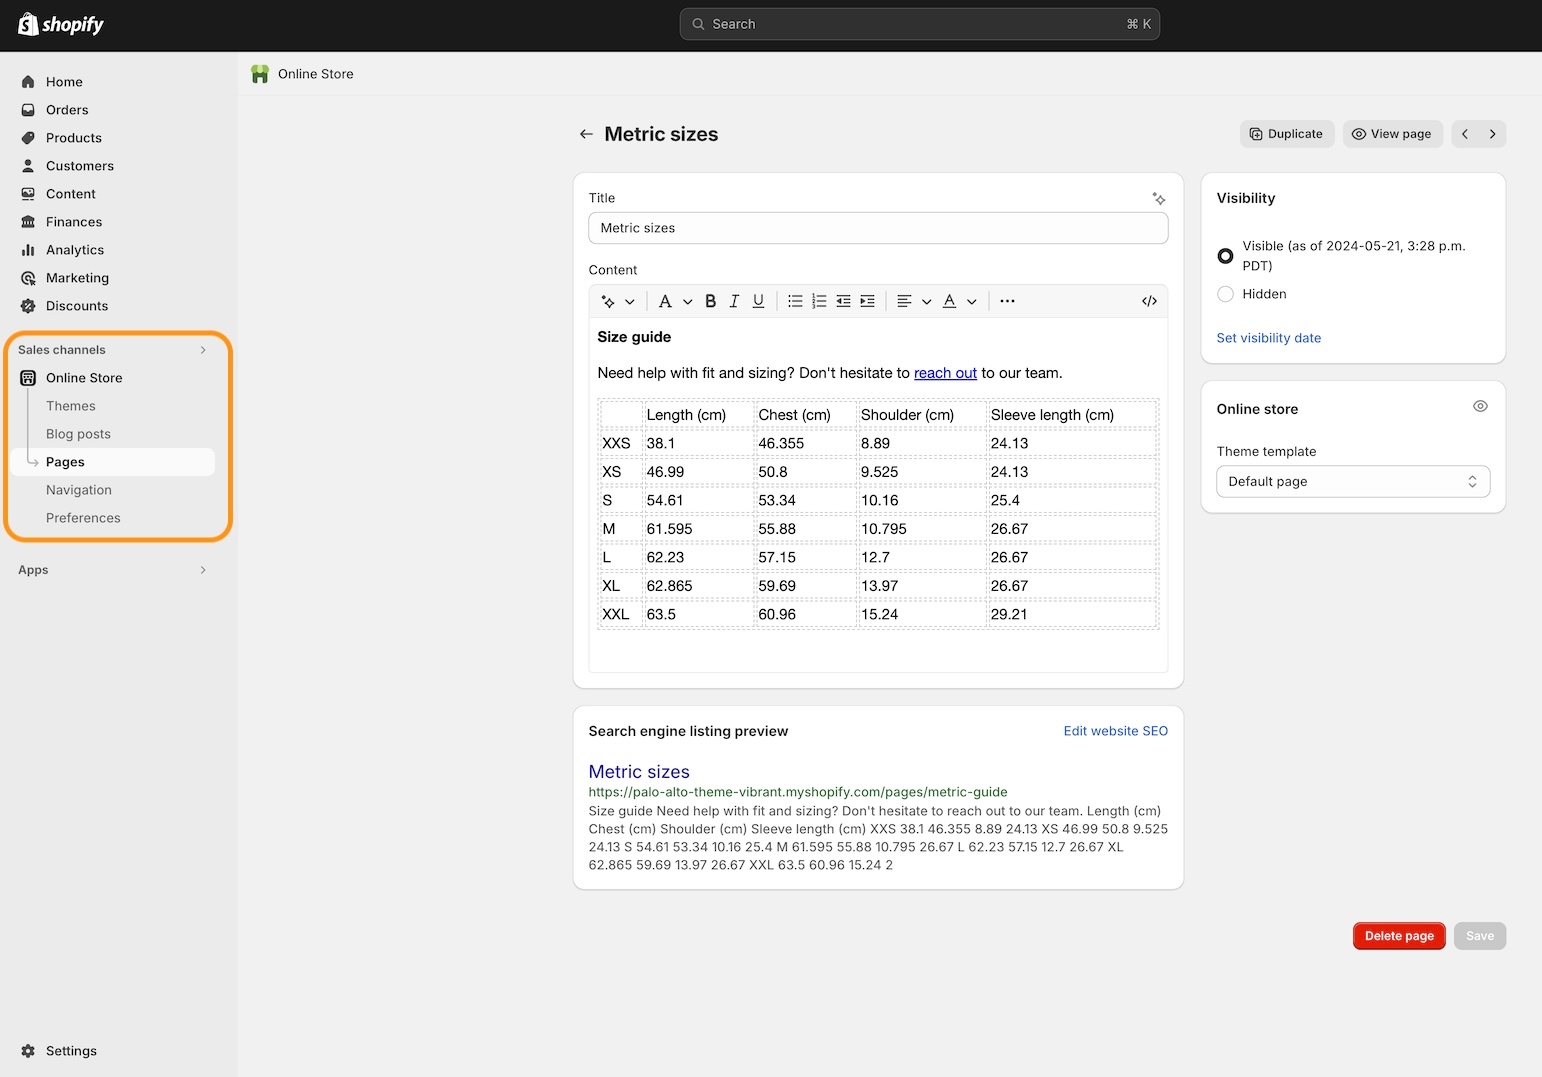
Create as many size-chart pages as necessary for your products.
Step 2 - Tags
About Palo Alto's Size Charts:
Static (easiest) - Instantly displays one size chart for all your products. Choose a page, and that chart will appear on all product pages.
Metafields - This method uses a custom metafield to display unique size charts for any product. It lets you pick which products will show a size guide link and associate it with a specific page you've created.
Tags (this method) - With tags, you can display single or multiple size charts in tabs. Each product is configured individually. Products without a tag won't display a size chart unless the static version is used or the product has a metafield. This method can be combined with Static and Metafield charts, displaying all charts in tabs.
The tags method is very flexible and simple to set up. Palo Alto uses a custom tag prefix to trigger and map a product to a size chart page.
The custom tag format has two parts:
Prefix
Page handle
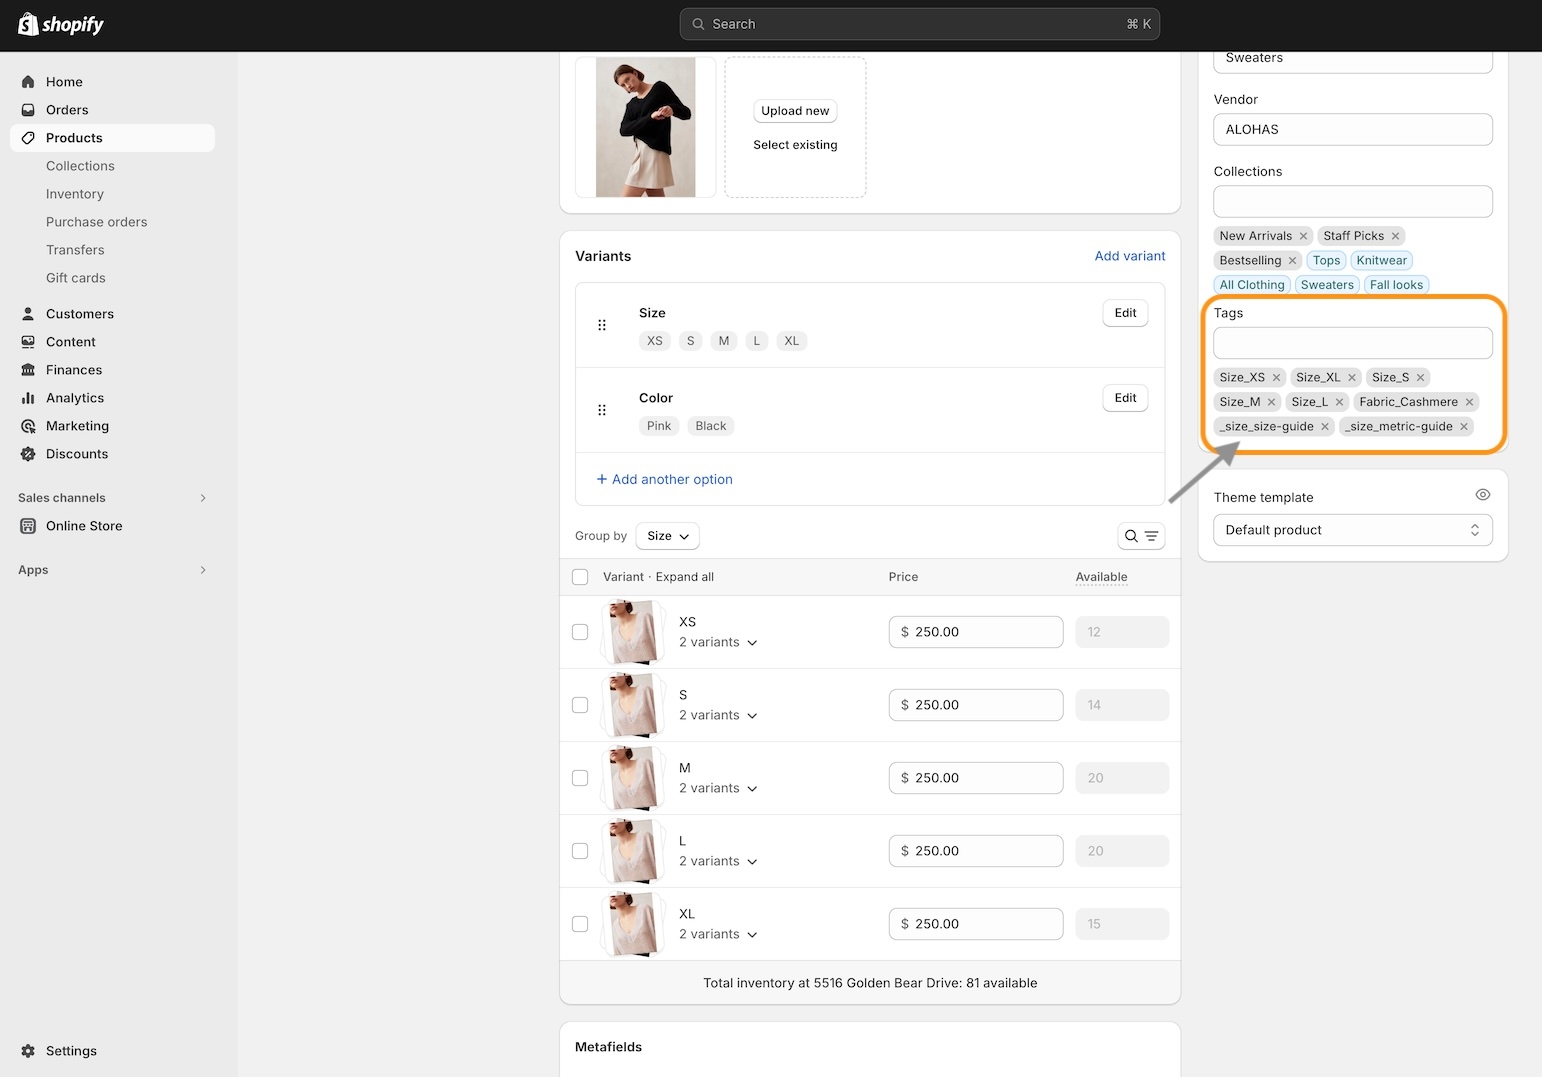
Here's an example of the tags we used to show two size charts:
Prefix
The prefix (first part of the custom tag) is:
_size_
Page handle
The page handle is found at the bottom of each size chart page:
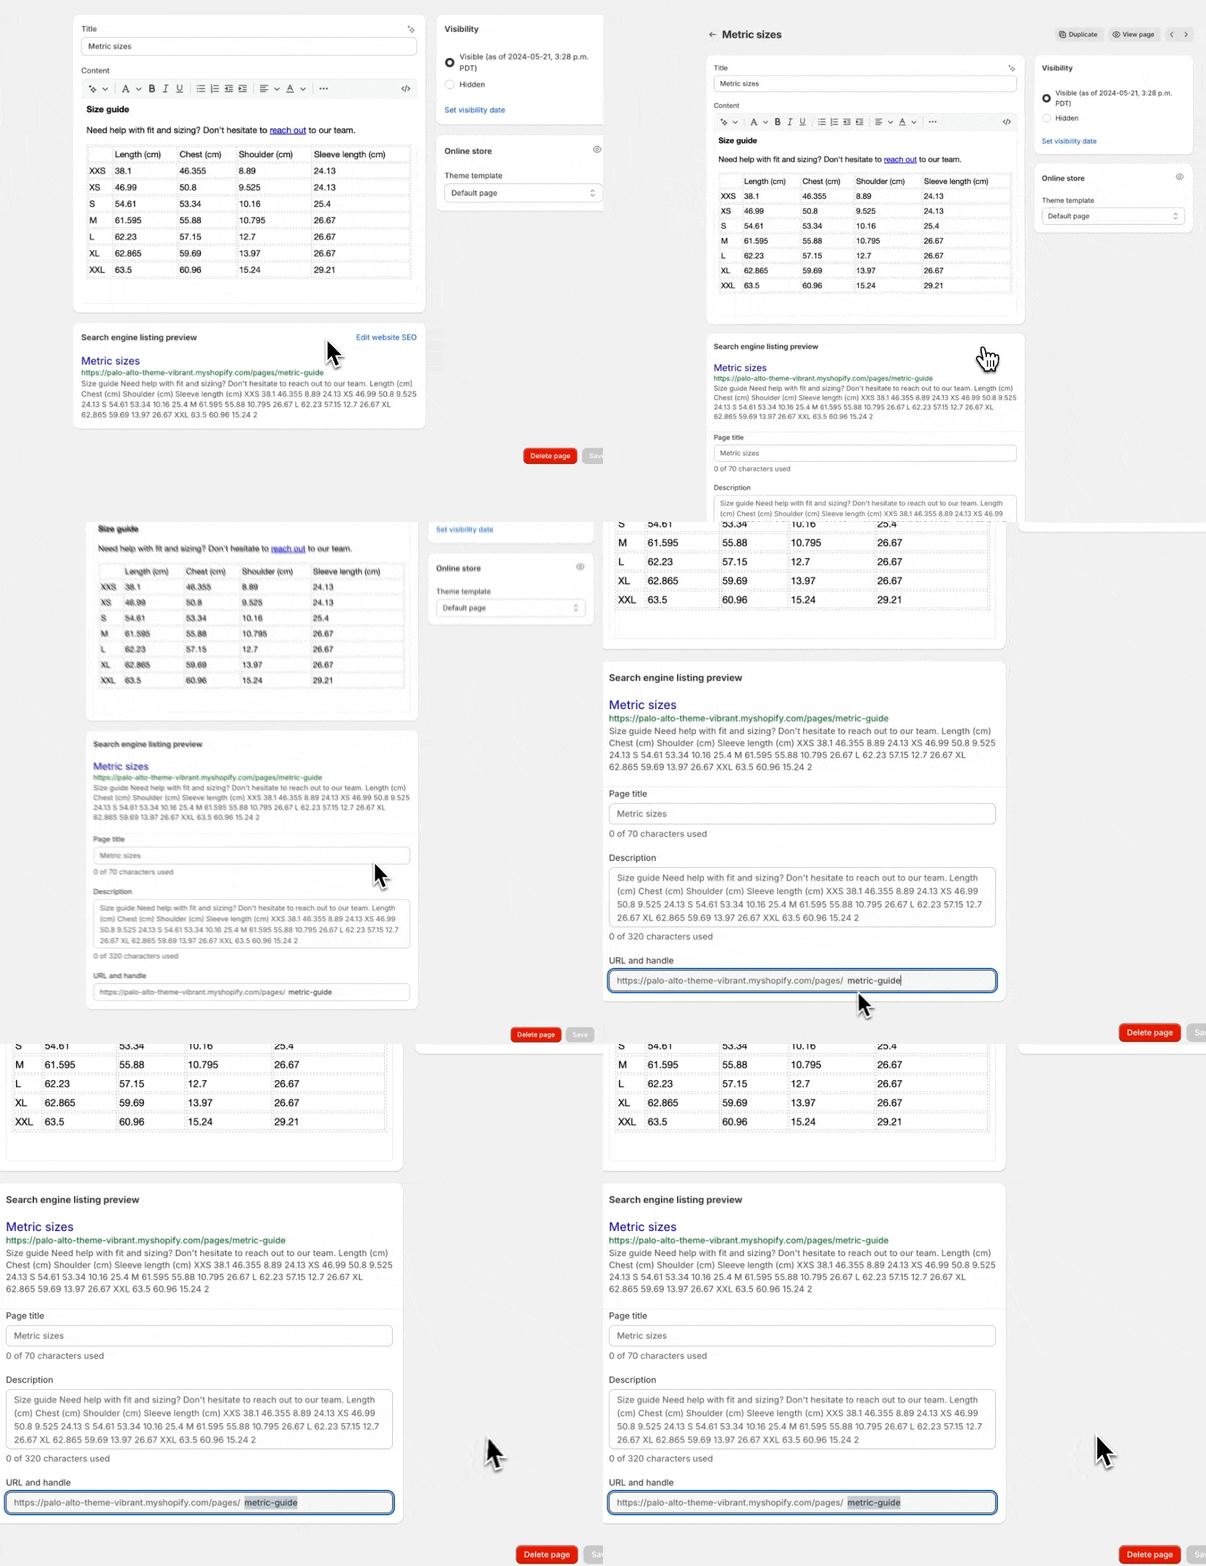
Use the "Edit website SEO" link to copy the handle to your clipboard. The exact handle is required, as a typo will break the link.
Together
Put them together to build your tags.
Prefix: _size_
+
Sample page handle: metric-guide
=
_size_metric-guide
Final tag example: _size_metric-guide
Remember to use the page handle from your pages built in the Shopify page editor.
Add to products
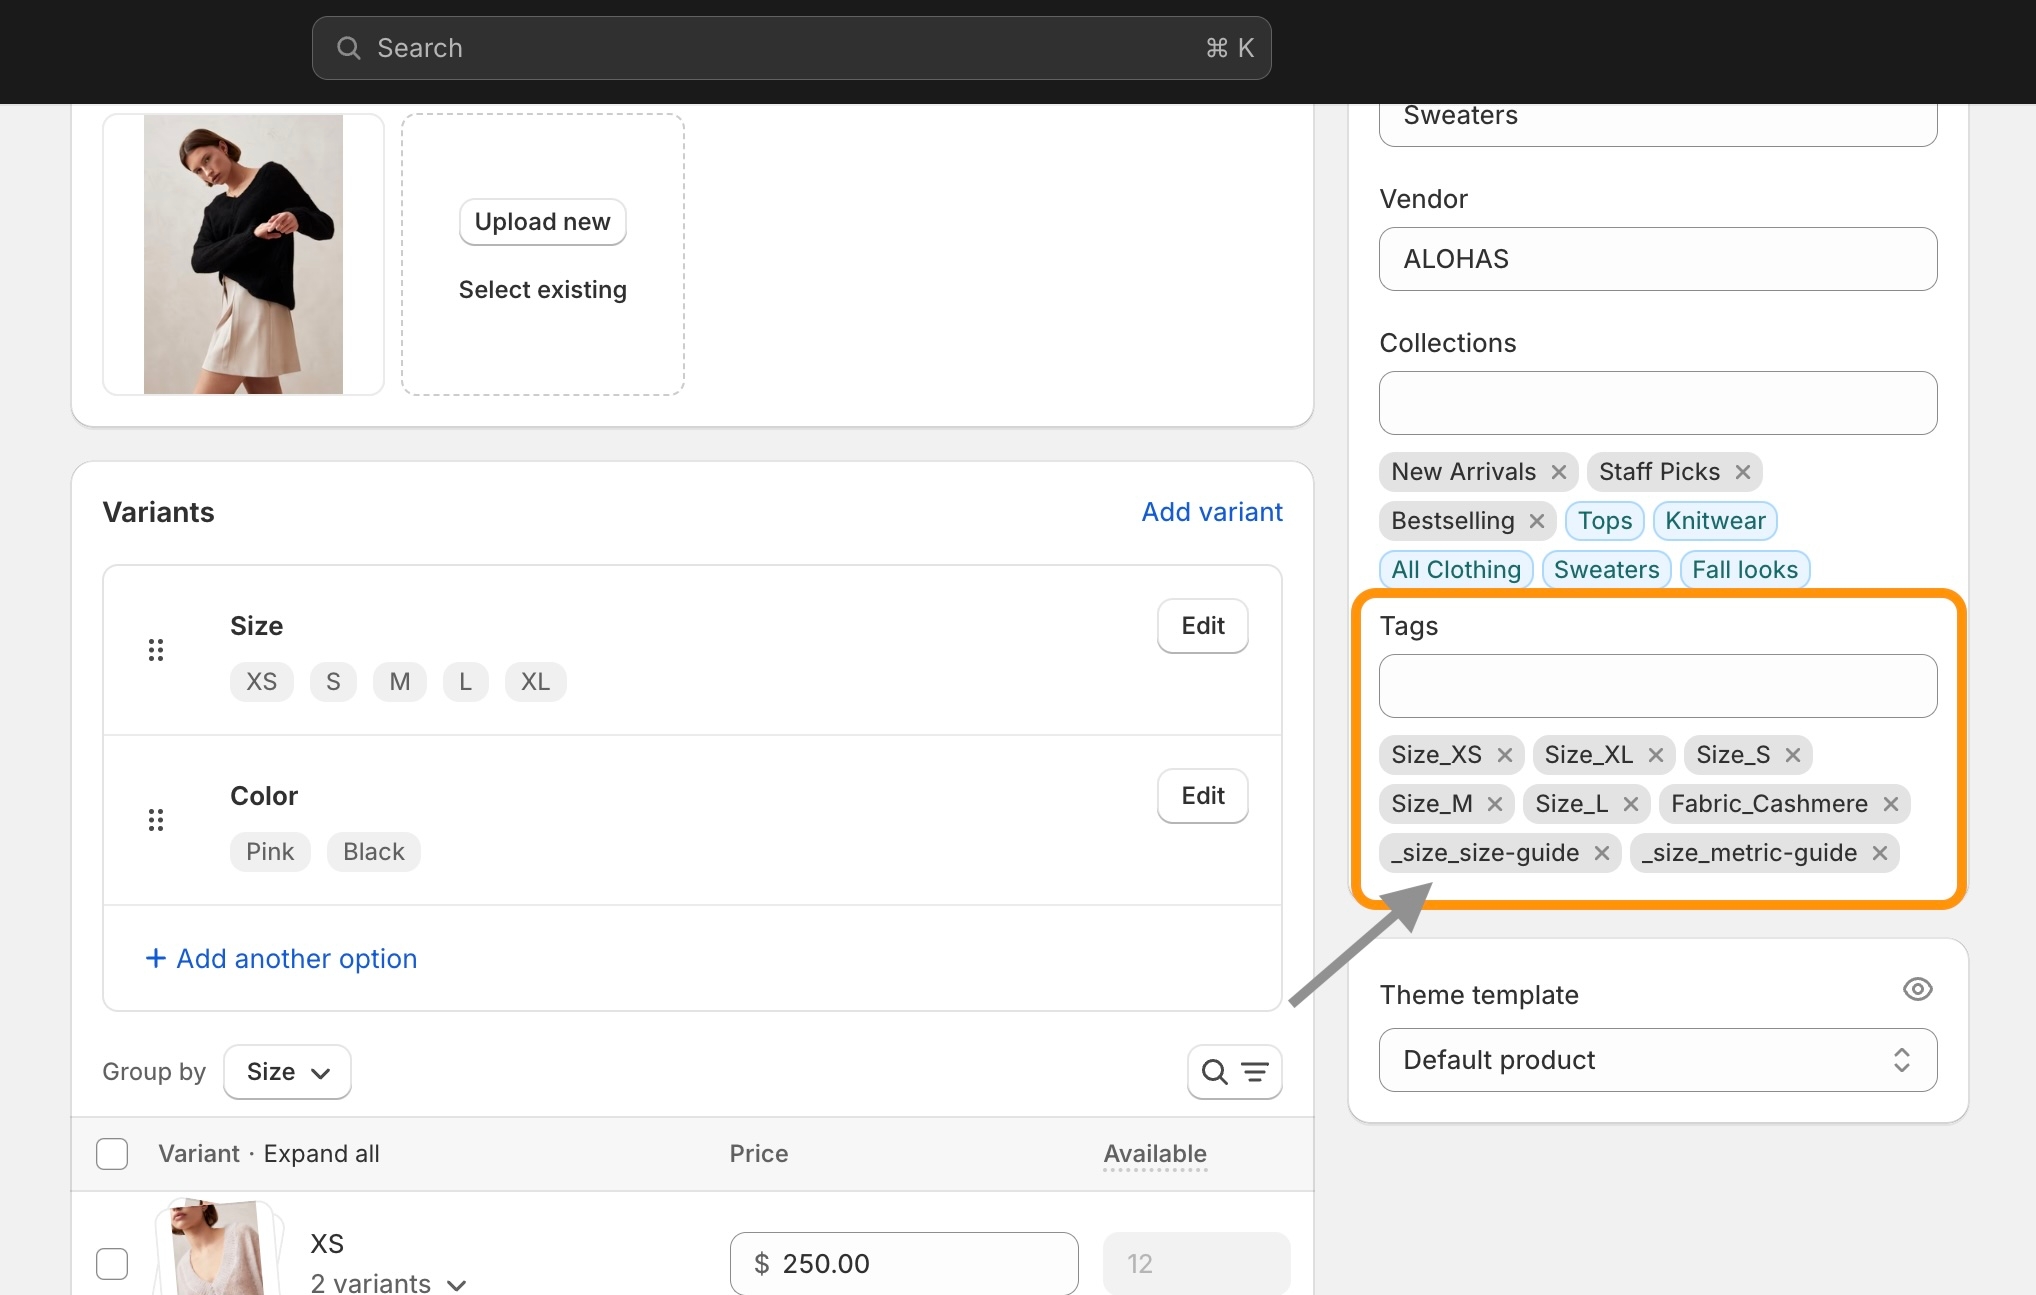
Add your custom tags to individual products. Use a single tag to display one size chart, or add additional tags to display multiple size changes.
Example of multiple tags:
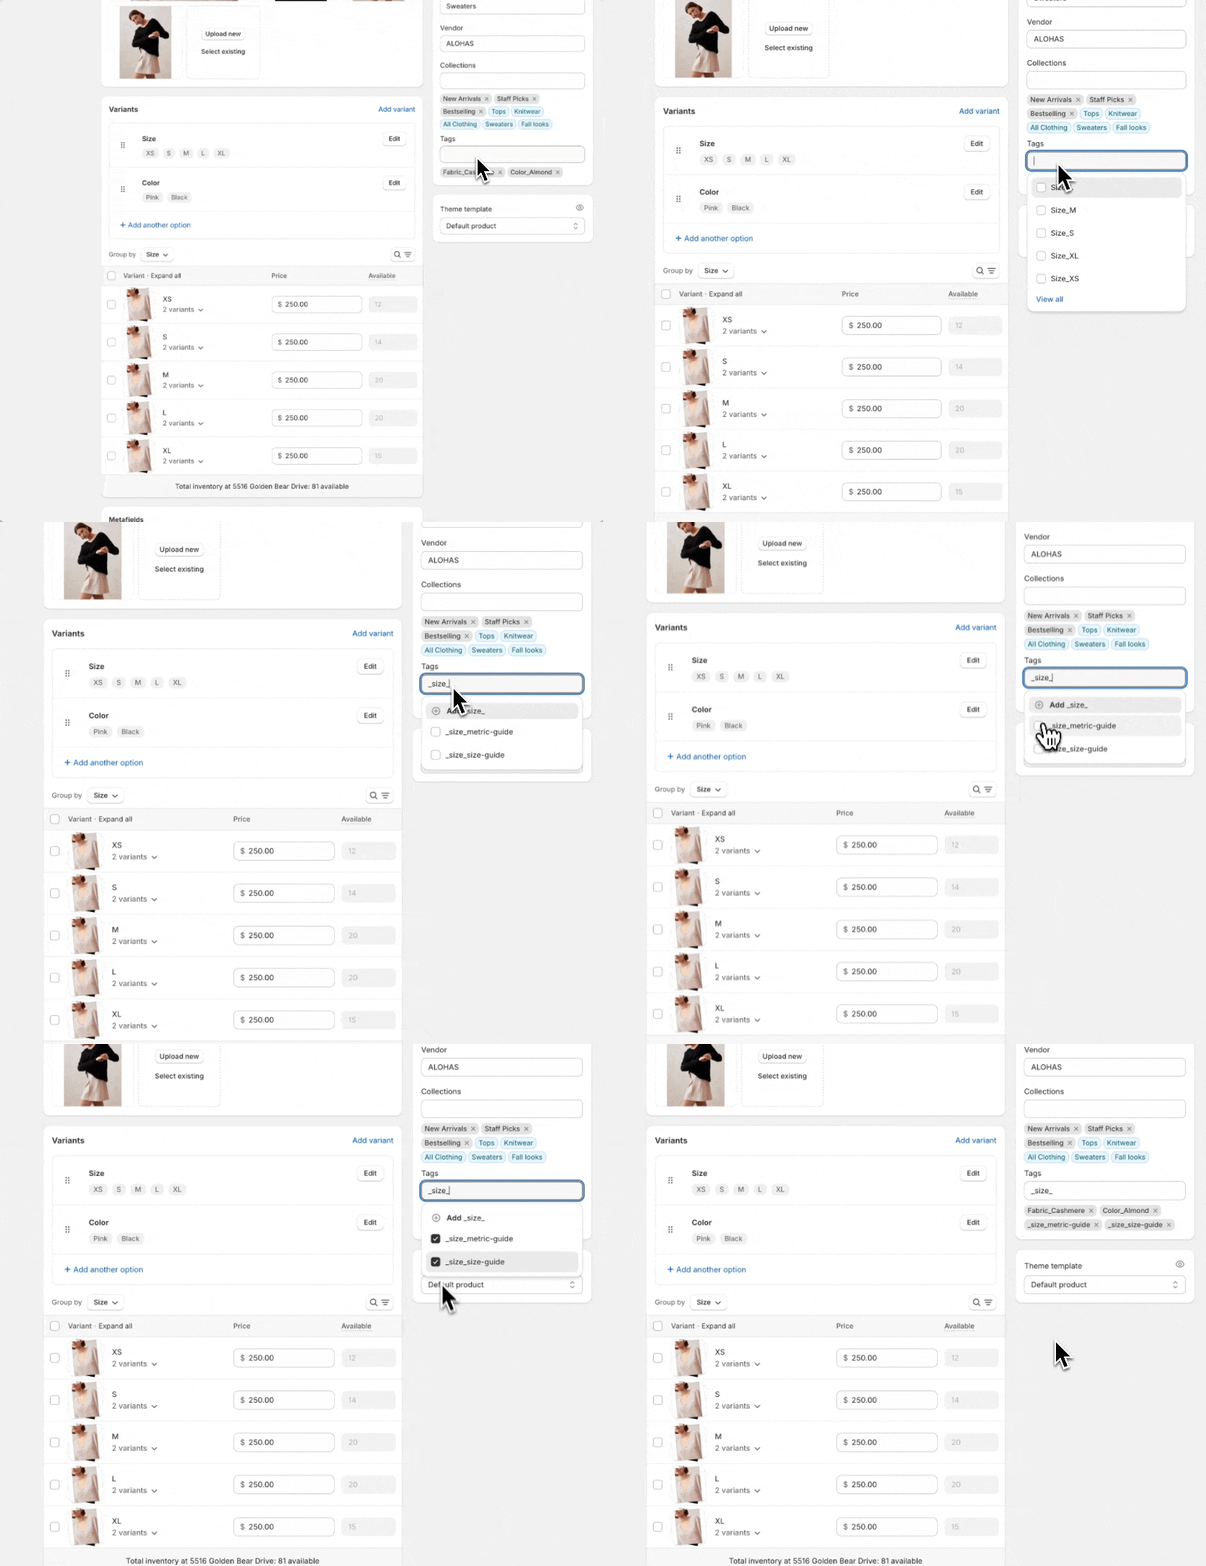
After you've created custom tags, they can be chosen easily when adding to other products:
Step 3 - Customize
In the Theme Editor, you can customize how the tabs appear. Use the Theme settings > Size chart options to finetune the look of your size chart drawer:
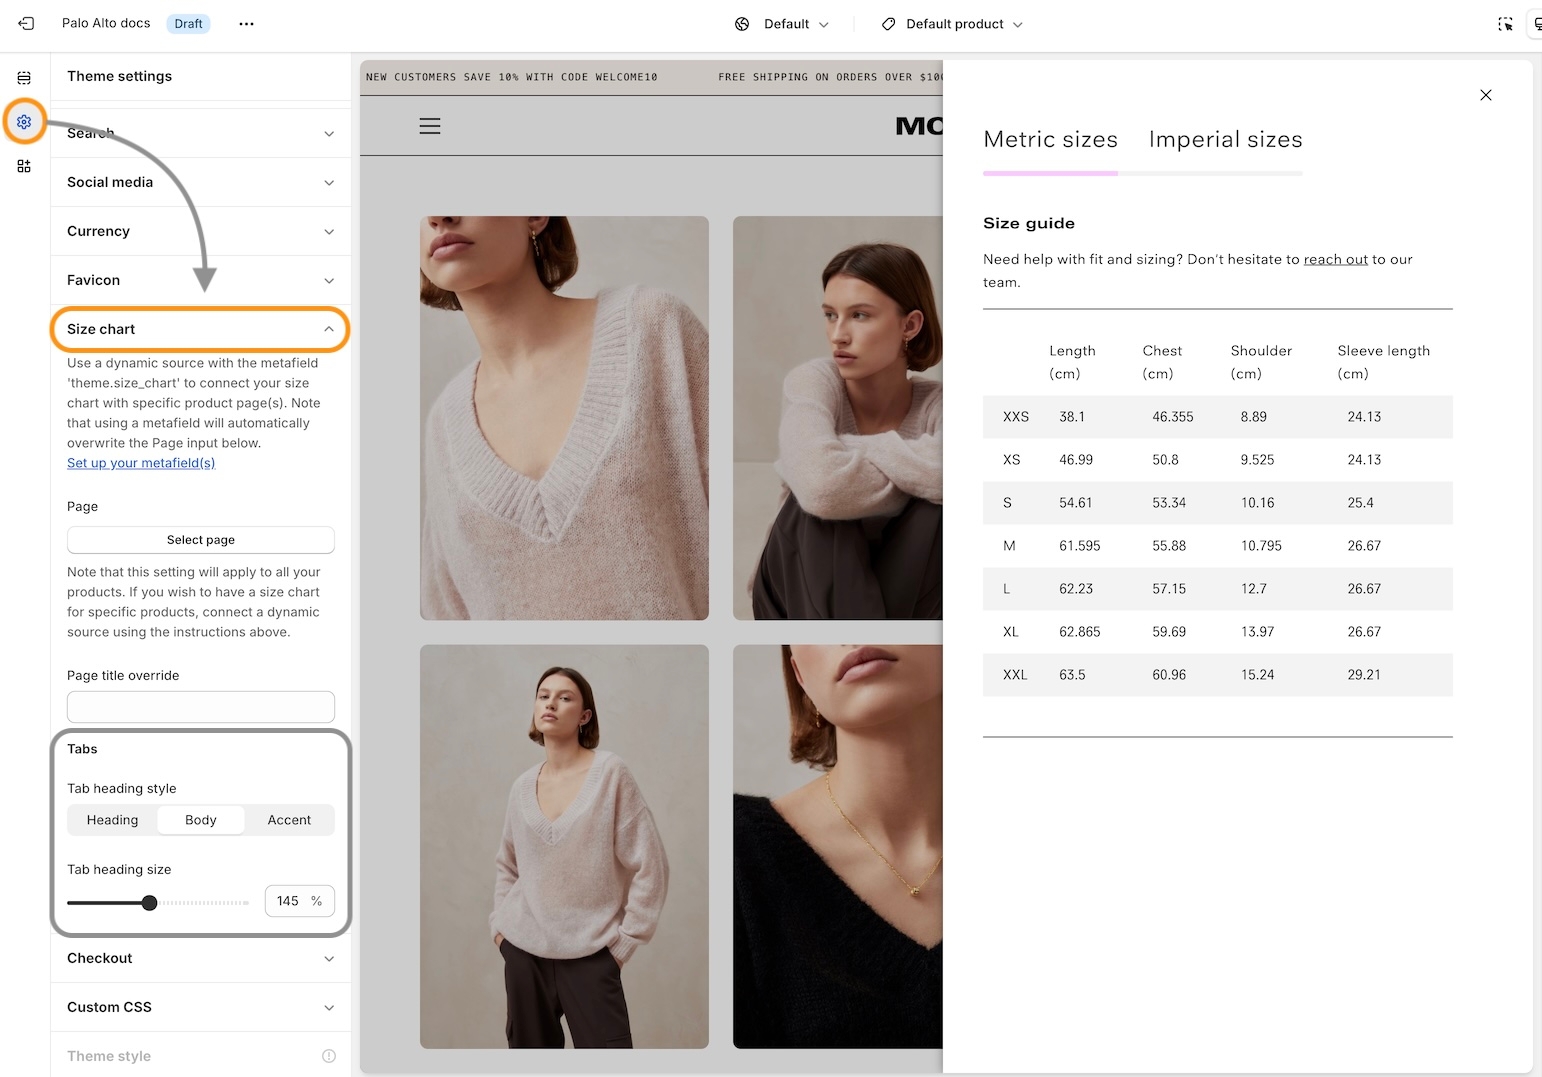
Tab heading style
Choose the preset font style.
Tab heading size
Adjust the size of the heading.
Tab underline color
The underline uses the Accent color from your Theme settings:
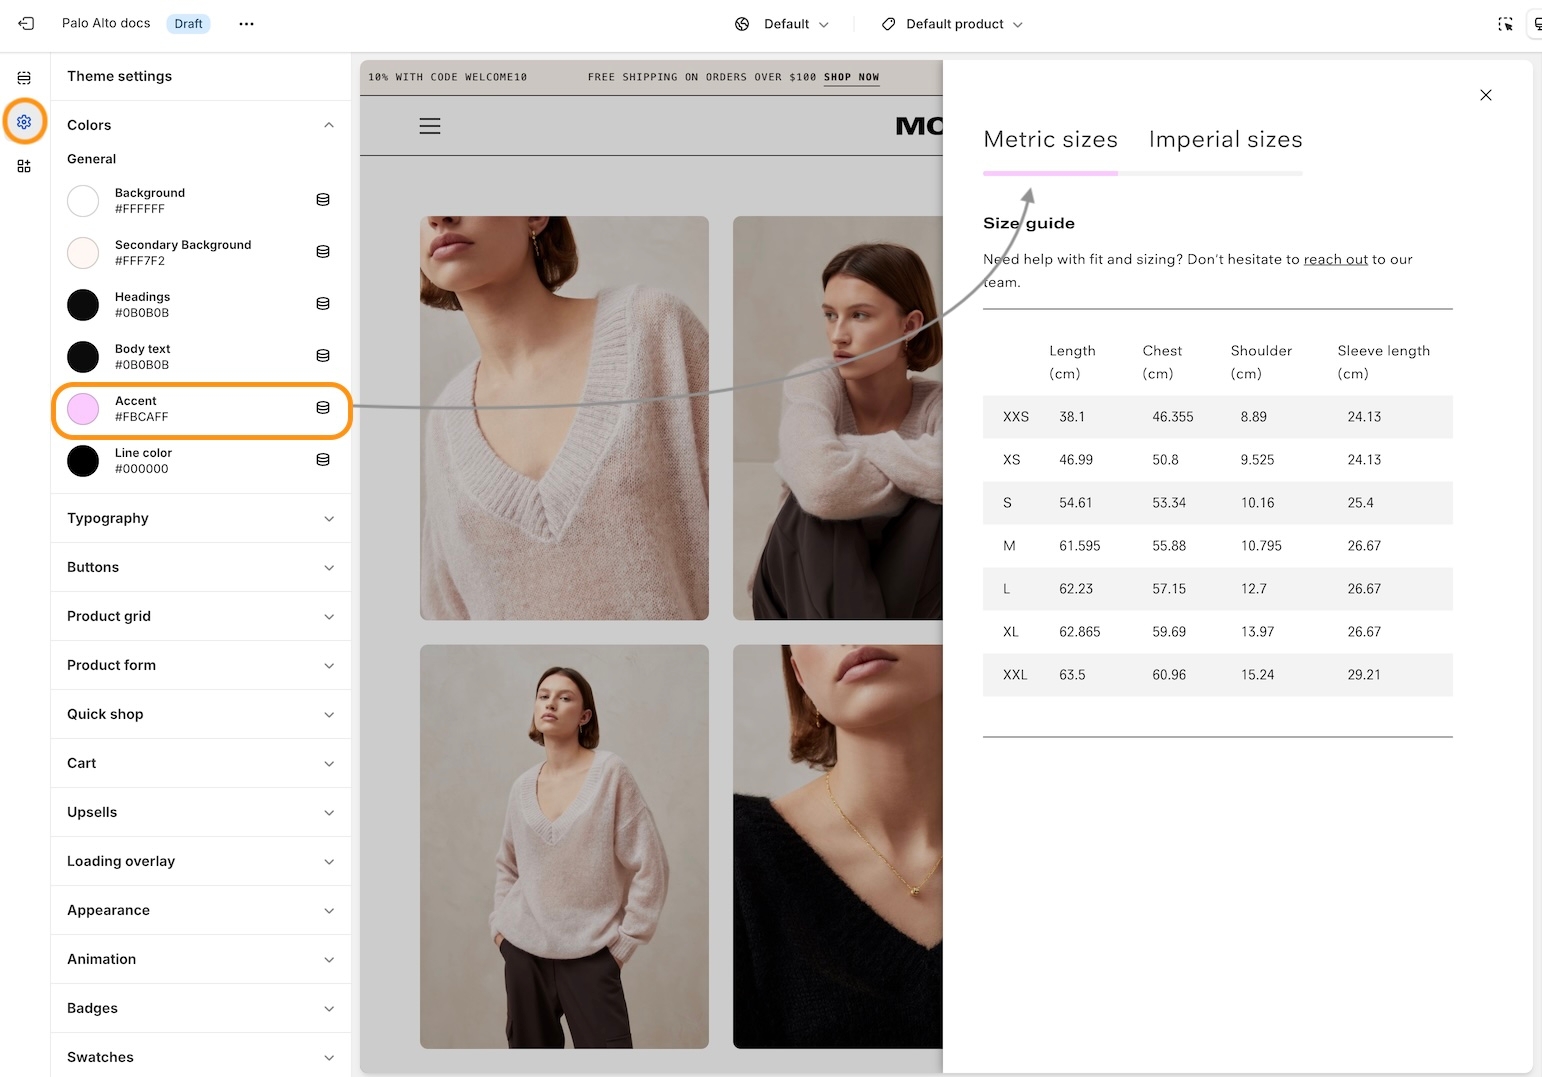
Note: Changing this value will affect other areas in the theme where the accent color is used.
Result
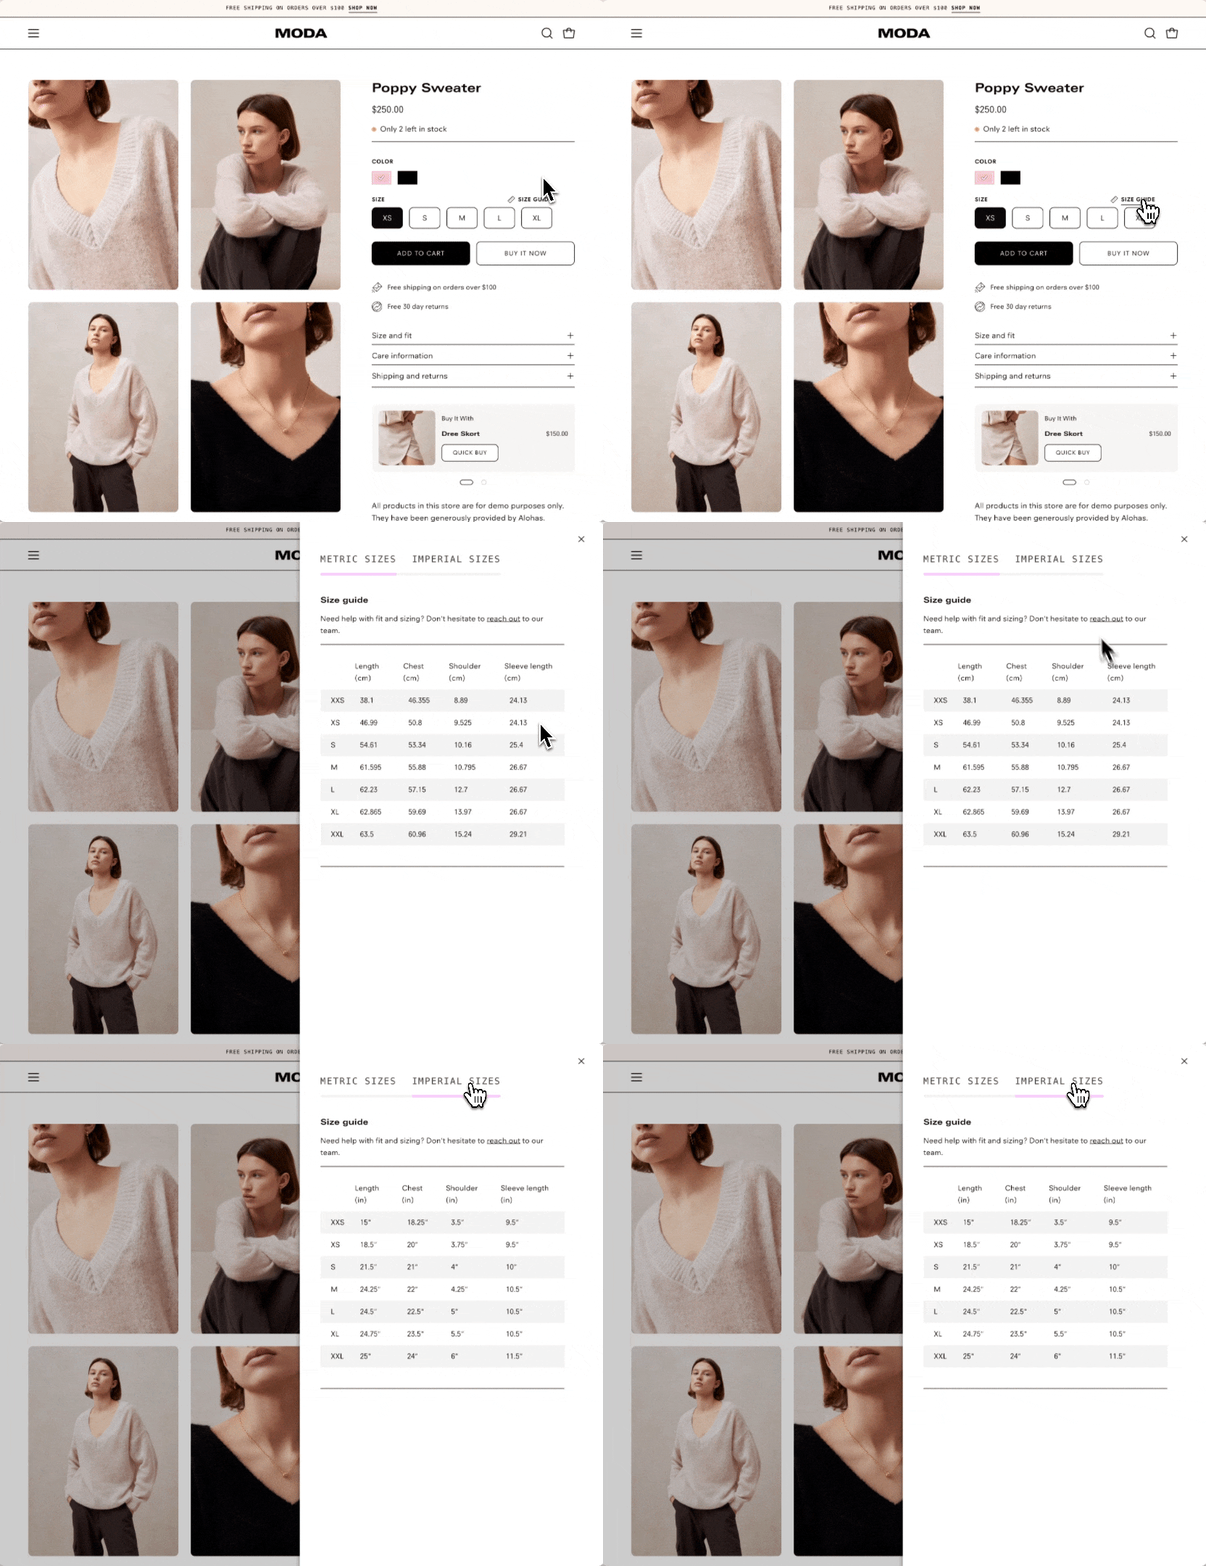
Palo Alto will use the custom tag(s) applied to each product and display them when the customer uses the Size guide icon on the product page:
Edit language
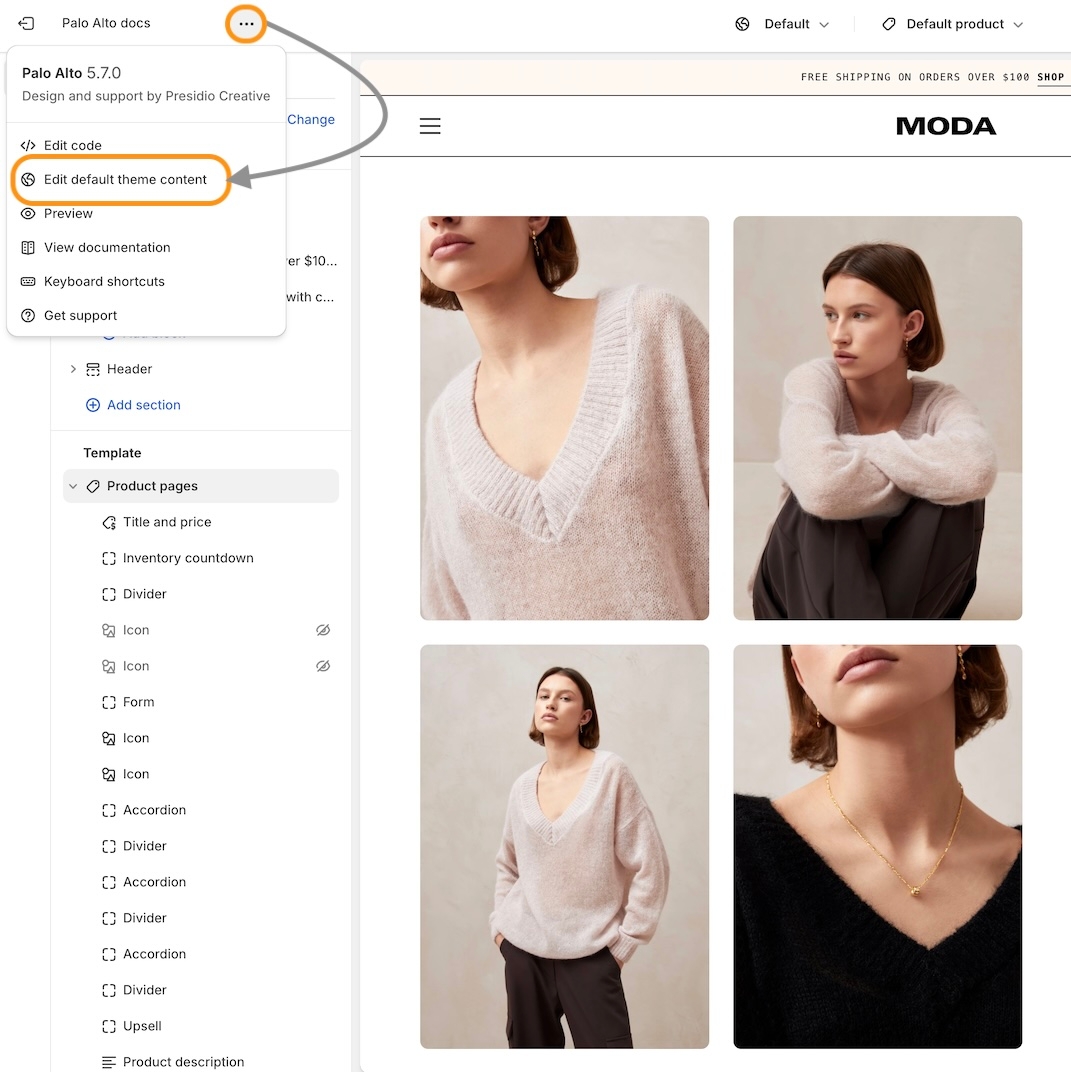
You can edit the default theme content to change the text 'Size Guide' next to the ruler icon.
Click on the ellipsis (three dots) at the top-left of the Theme Editor and choose 'Edit default theme content':
In the Content editor, sometimes known as the Language editor, under the General tab, modify the text that's under Size chart -> Button:
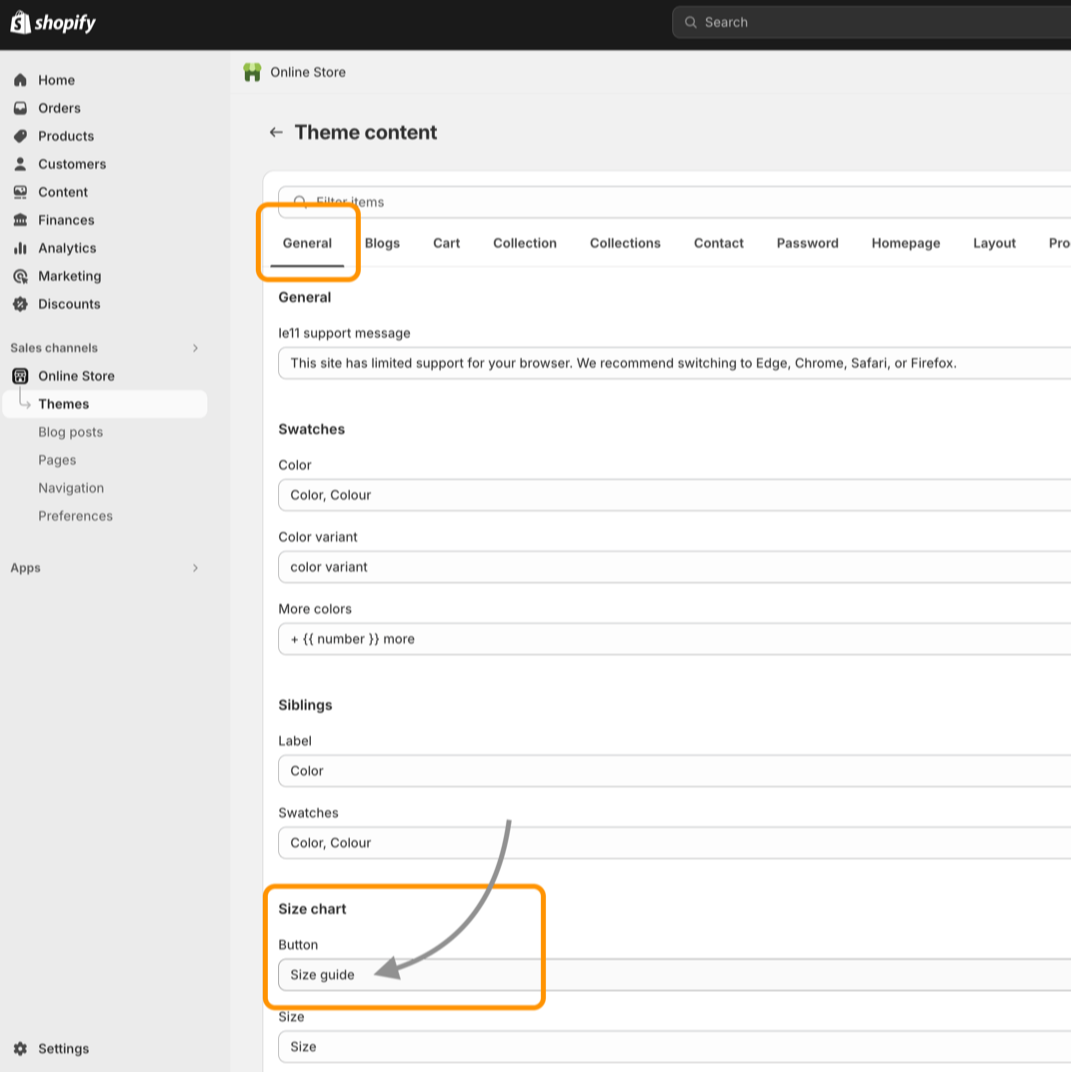
Save the changes.
Last updated