How to add Custom Fonts
Adding custom fonts for your menu, buttons, headings, and body text.
Uploading your Font Files
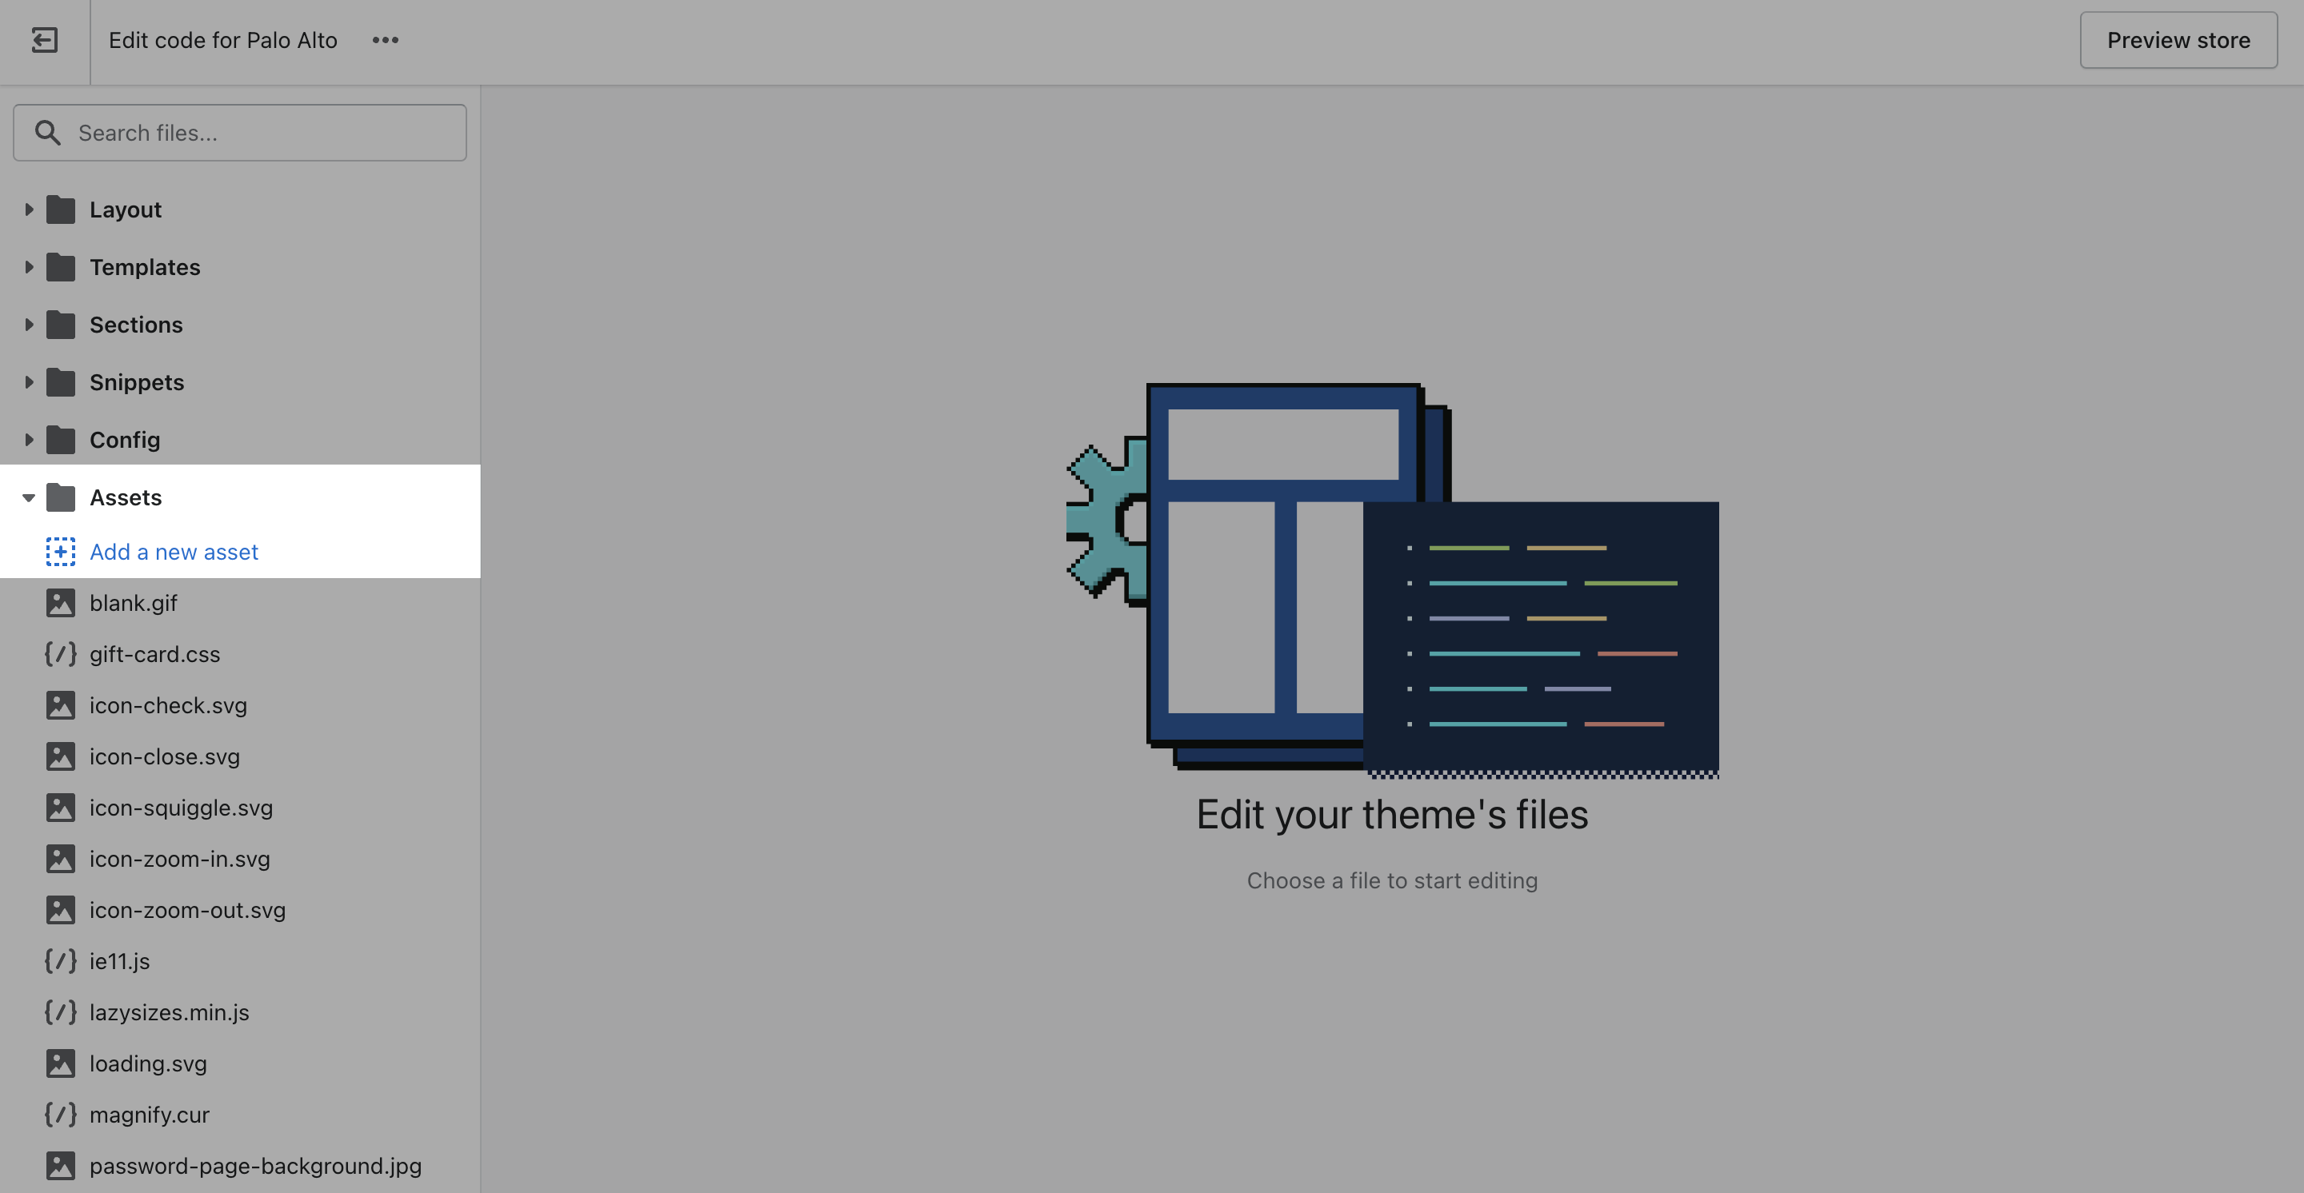
In order to use your own custom fonts, you will first need to upload the font files. To do this, you'll need to head on over to your Online Store > Themes and click on Actions > Edit code.
From here, open the Assets folder and upload your font files into it:

Defining the new Font Families
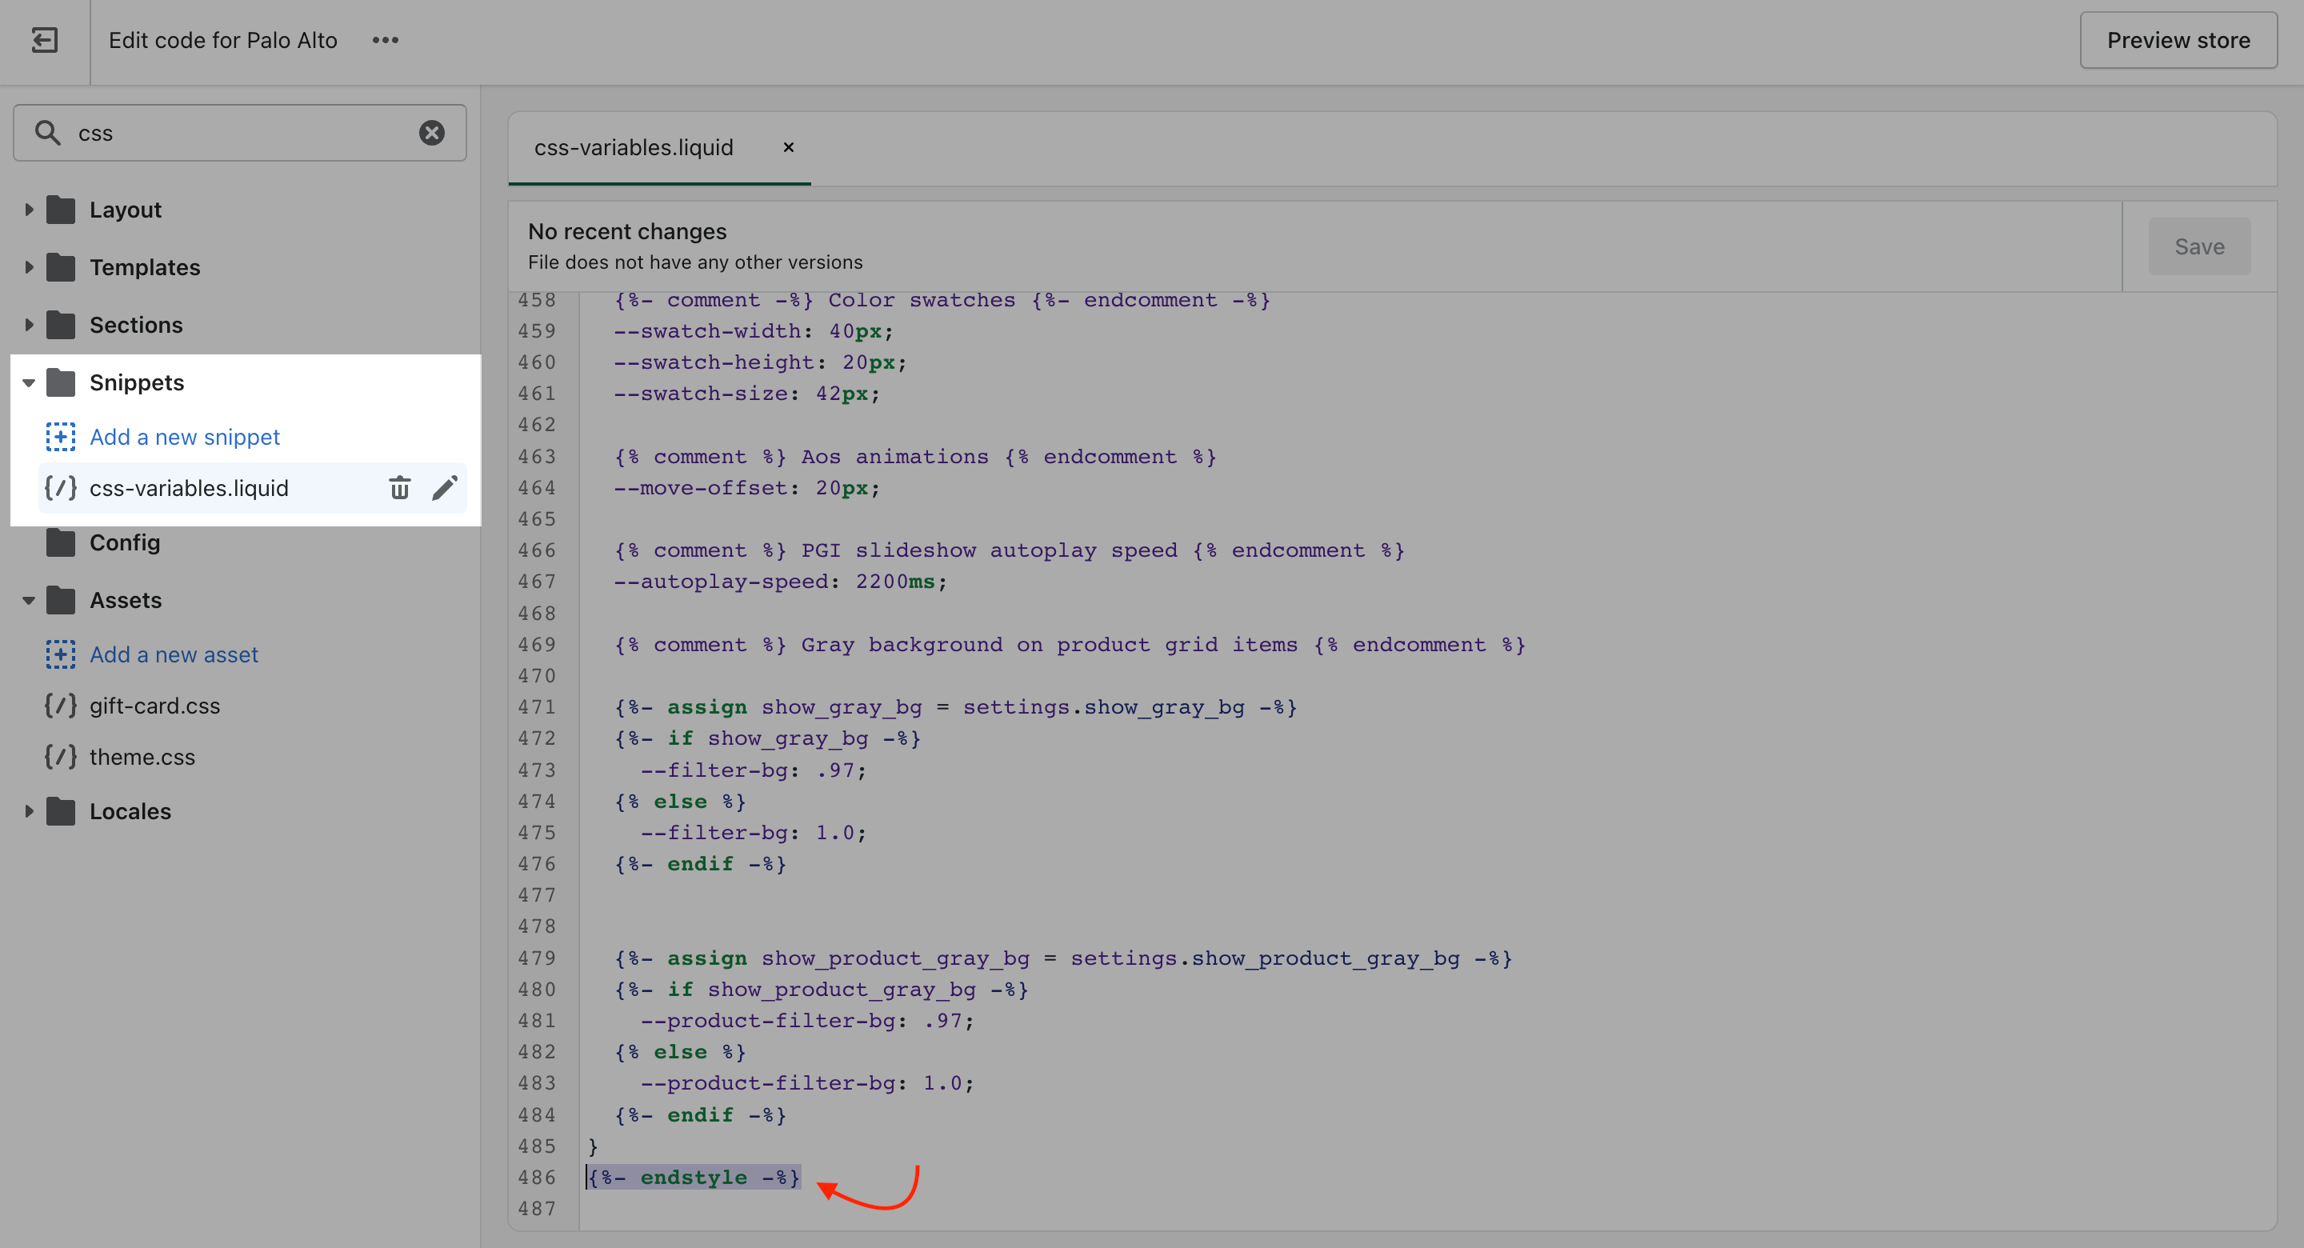
Now that we have the assets sorted out we can head on over to the 'css-variables.liquid' file located in the Snippets folder.
Here you need to scroll all the way to the bottom and add a bit of code before the closing style tag (' {%- endstyle -%} '):

This is the place where you need to add this code snippet:
In this code snippet, you need to replace all references of 'Gotham' with your own font name and font file names.
If you have to upload more than one font, you need to declare each one individually and use multiple instances of this code snippet.
Assigning your Custom Fonts
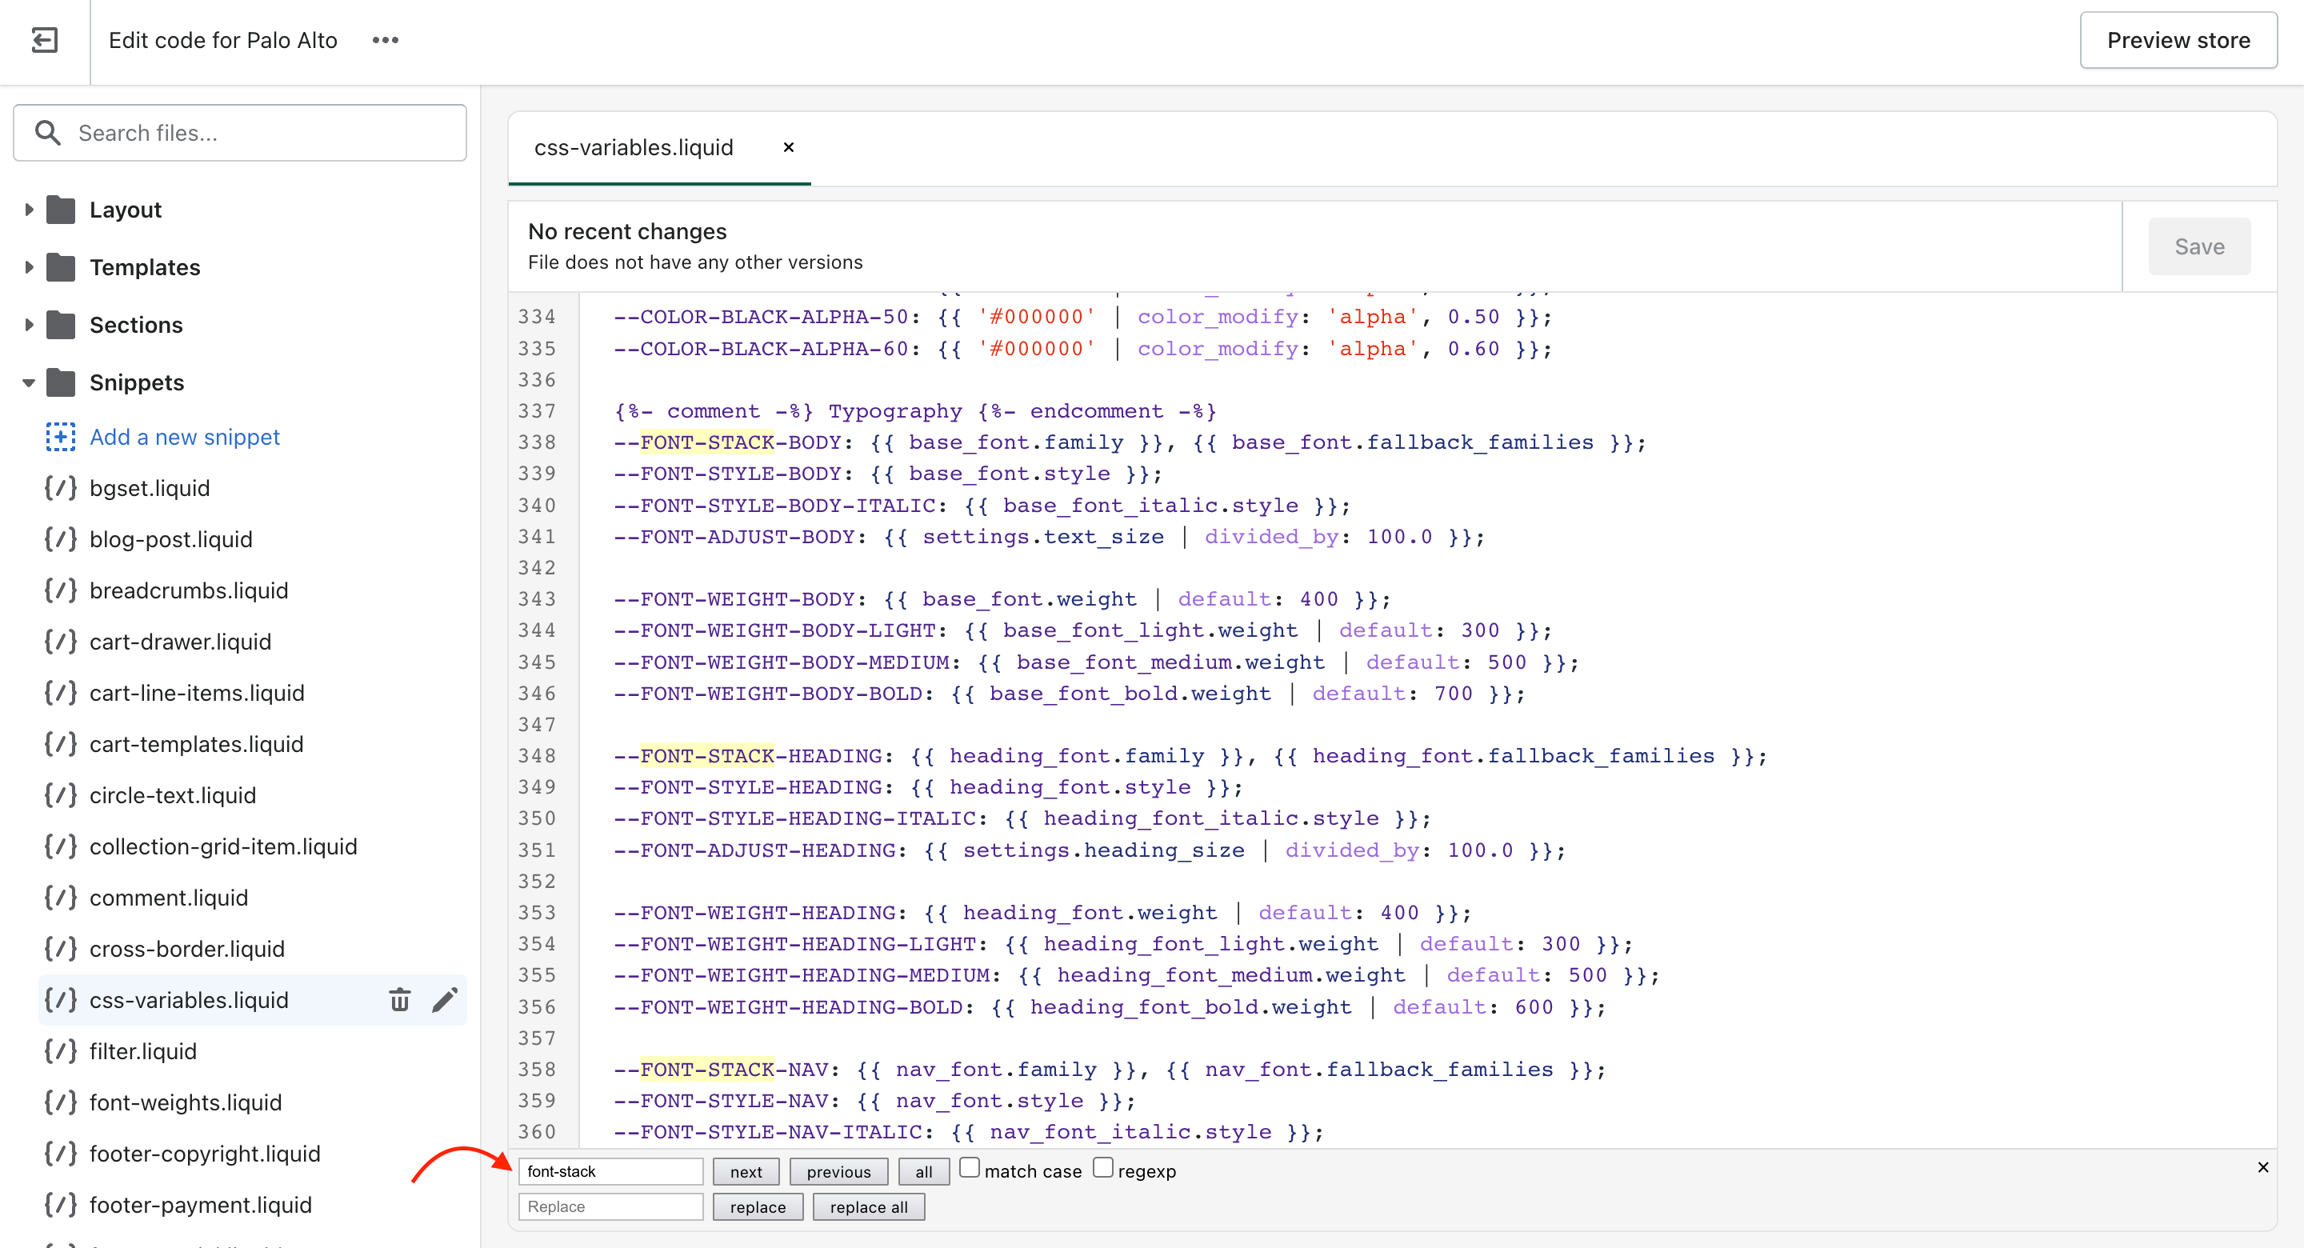
Finally, all we need to do is assign the new fonts to be used. There are four global font variables that control the fonts for the headings, body text, buttons, and navigation menu.
You can easily find all of them by using CTRL + F (or Command + F) and searching for 'font-stack':

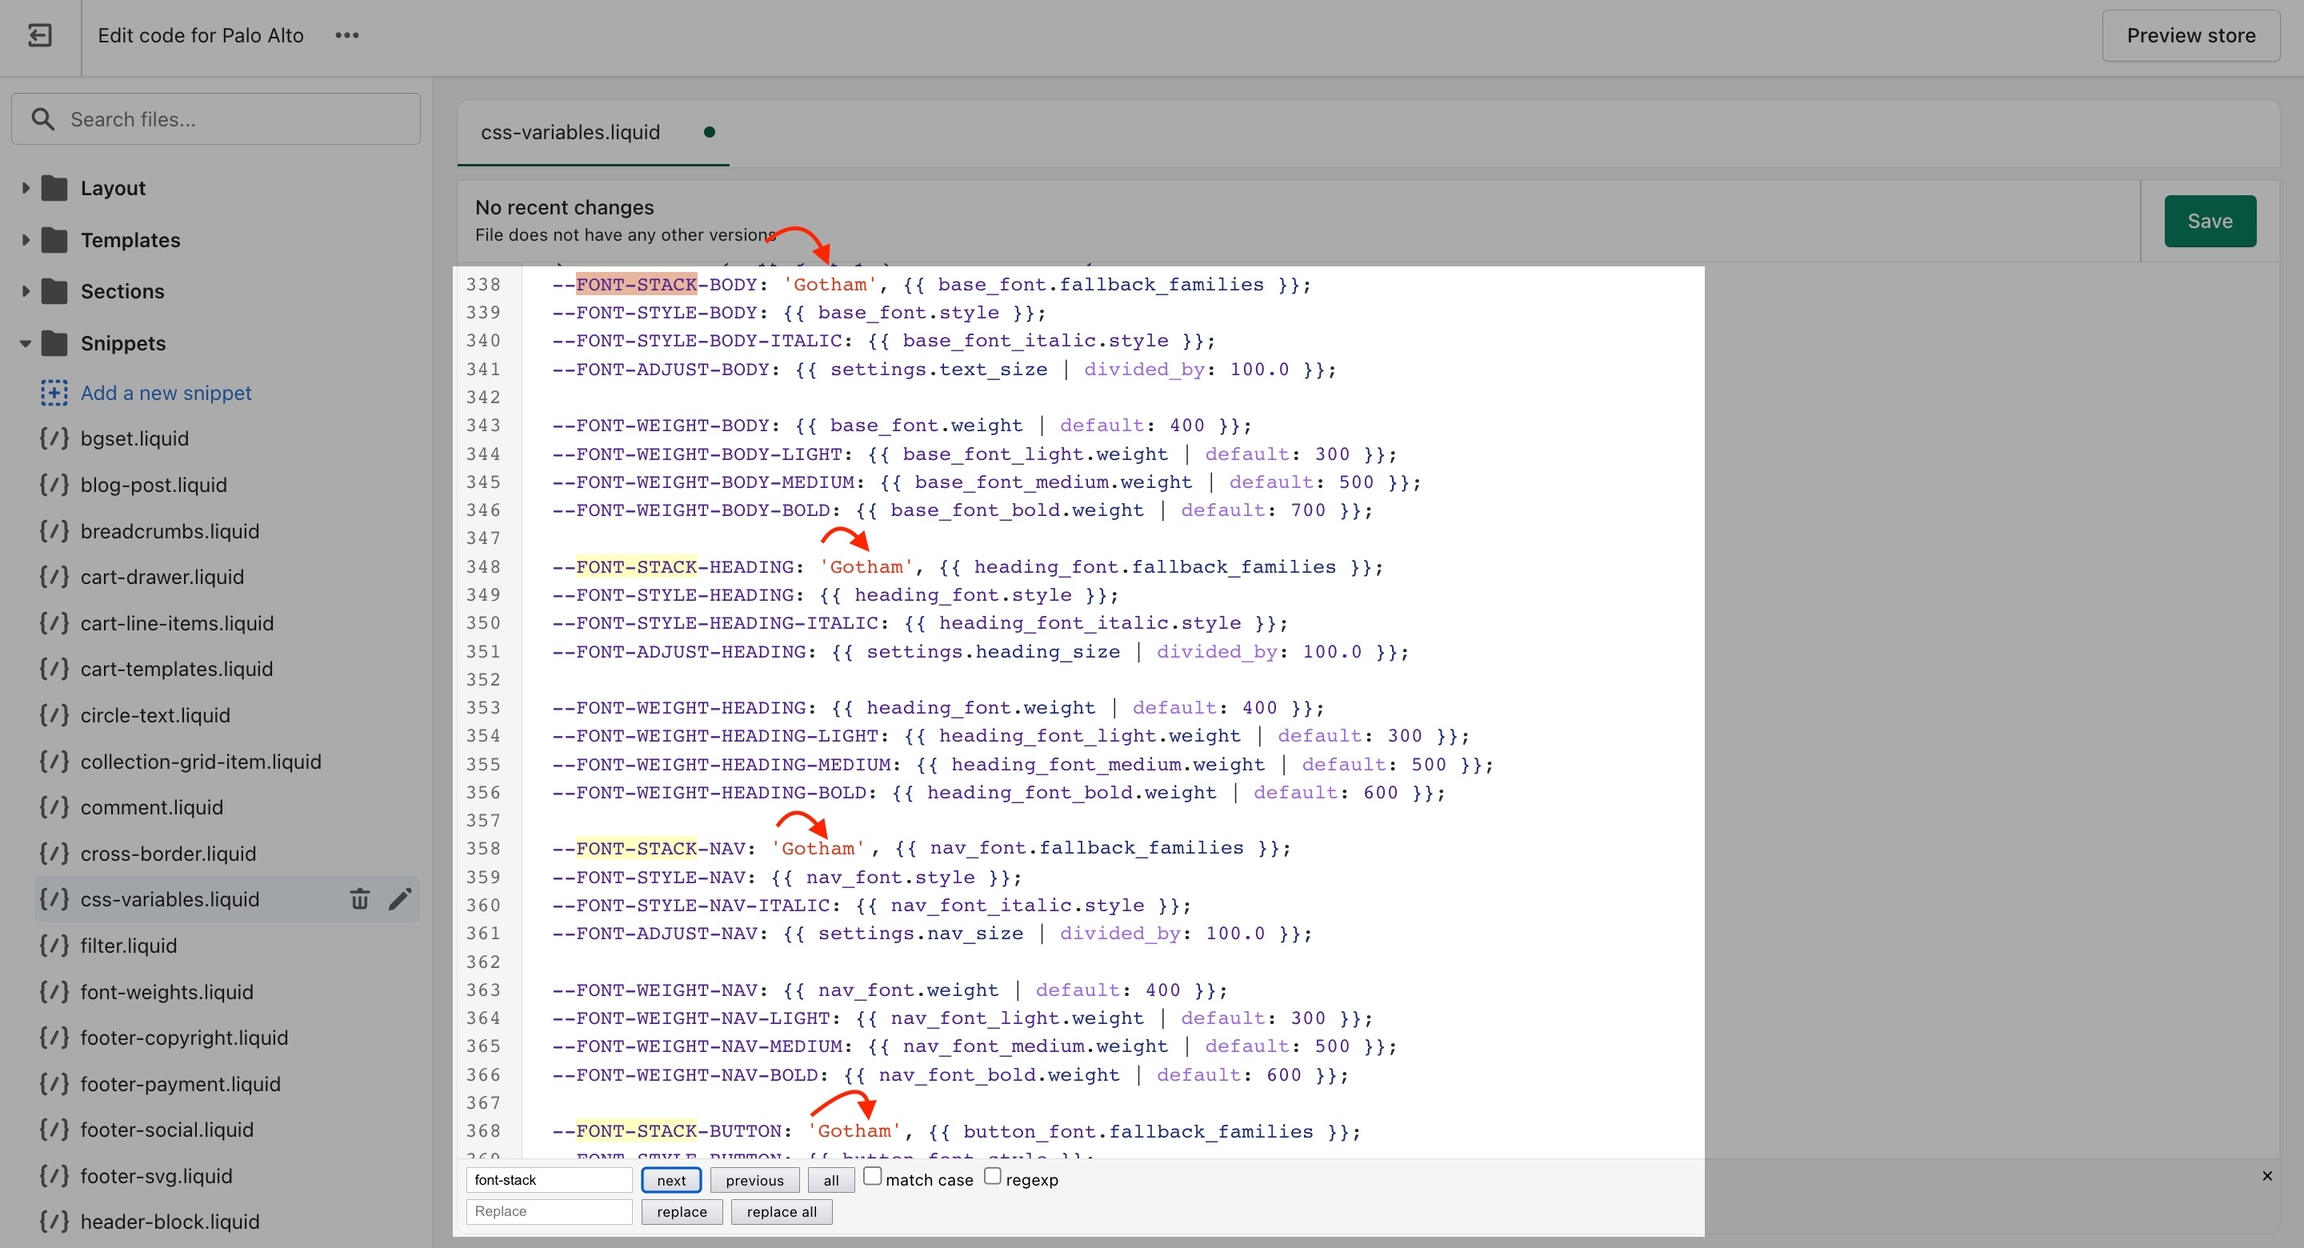
All you need to do here is to replace the first value assigned to the variables you're looking to change.
We'll continue to use 'Gotham' in our example to keep it consistent but this is also a place where you input your custom font name:

That's it, you're all set and ready to go. Just don't forget to Save the changes.